Edge Banding: What It Is, the Types & How to Apply It

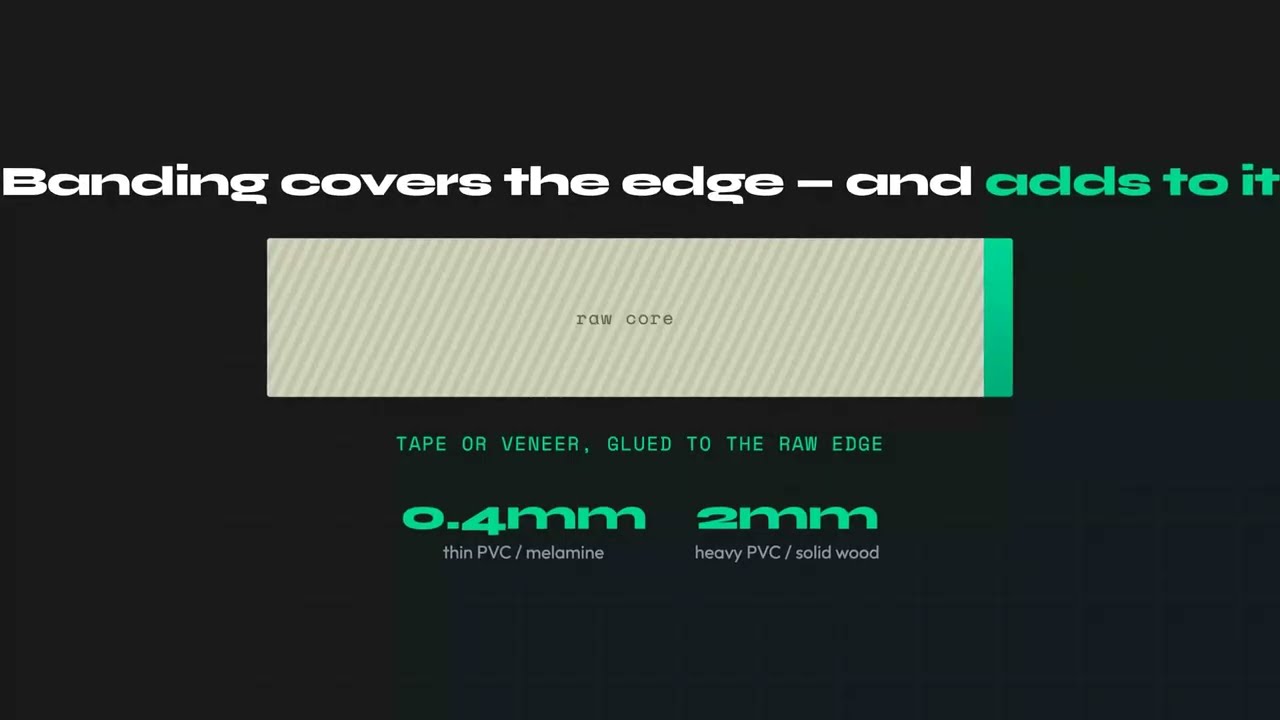
Edge banding is a thin strip of PVC, ABS, real wood veneer, or solid timber applied to the exposed edges of sheet goods like plywood, MDF, and particle board. It hides the raw core, seals it against moisture, and gives the panel a finished, factory-clean look. The one thing to settle before you cut: banding sits on top of the panel, so the finished part is wider and taller than the piece you cut. If the banding is 1mm or thicker, subtract it from your cut dimensions on every banded edge, or the part comes out oversized.
That single rule is where most edge banding errors start. This guide covers the five banding types and when to use each, exactly which edges to band on a typical cabinet, the cut-list math worked through with real numbers, an application walkthrough that actually holds, and the mistakes that cost people a wasted sheet or a door that will not close.
Why Edge Banding Matters
Raw edges on sheet goods are not just unattractive - they are a functional weak point. The core of plywood, MDF, and particle board is porous and unsealed. Left exposed, it wicks moisture straight out of the air, and in a kitchen or bathroom that means swelling, delamination, and eventually a spongy edge that chips when you bump it. Particle board is the worst offender: once the core soaks up water it never recovers.
Banding seals that core and gives you an edge that matches the panel face. In cabinetry it is not an upgrade, it is the baseline any client or building standard expects. Melamine-faced boards often arrive pre-banded on their two long factory edges, but the moment you rip or crosscut, you create fresh raw edges that need banding of their own. Keep that in mind while you plan a kitchen cabinet cut list: every cut is a new edge decision, not just a new part.
The 5 Types of Edge Banding Compared
There are five common families of banding. The right one depends on durability, appearance, budget, and whether you own a banding machine or an iron. Here is how they stack up.
| Type | Typical thickness | Adhesive | Best for | Affects cut size? |
|---|---|---|---|---|
| Iron-on PVC / melamine tape | 0.4 - 0.8mm | Pre-glued hot melt | DIY, small shops, most cabinet work | No (ignore it) |
| Pre-glued veneer tape | 0.5 - 0.6mm | Pre-glued hot melt | Plywood you want to match to a wood face | No (ignore it) |
| Unglued PVC / veneer strip | 1 - 3mm | You apply contact cement or PVA | Higher-wear edges, better impact resistance | Yes |
| Solid wood lipping | 3 - 6mm+ | PVA, clamped | High-end furniture, routed/profiled edges | Yes (a lot) |
| ABS (machine) banding | 0.4 - 3mm | EVA or PUR on a bander | Production shops, chlorine-free spec | Depends on thickness |
Iron-on PVC or melamine tape is the workhorse. It comes on rolls with a pre-applied hot-melt adhesive, ships in hundreds of colours and wood-grain prints, and at 0.4 to 0.8mm it is thin enough to leave out of your cut math entirely. A household iron will apply it.
Pre-glued veneer tape is real wood, applied the same way, and is the choice when you want a plywood edge to read as solid timber. It is more delicate than PVC and tears if you trim carelessly, so a proper double-edge trimmer earns its keep here.
Unglued strips at 1 to 3mm give a tougher edge but you glue them yourself and they start to matter dimensionally. Solid wood lipping is the durable, plane-it-flush, rout-a-profile option for fine furniture - and at 3 to 6mm per edge it dominates your cut list. ABS is the industrial, chlorine-free alternative to PVC, almost always run through an automated bander with EVA or PUR glue in a production shop.
How Edge Banding Changes Your Cut List
This is the part that trips people up, so let us make it concrete. Banding is added to the panel, so the finished dimension is larger than the cut dimension. If your drawing calls for a 500mm-wide shelf and you cut it 500mm, then band both ends, the shelf ends up wider than 500mm and no longer fits its opening.
Work backwards from the finished size instead. Take a shelf with a finished width of 500mm banded on both ends:
- Finished width: 500mm
- Solid wood lipping, 2mm per end: cut width = 500 - 2 - 2 = 496mm
- 6mm lipping per end: cut width = 500 - 6 - 6 = 488mm
- Standard 0.5mm iron-on tape: cut width = 500 - 0.5 - 0.5 = 499mm
The pattern is simple: subtract the banding thickness once for every banded edge along that dimension. A part banded on both long edges loses banding twice from its width; a part banded all four sides loses it twice from width and twice from length. The 1mm difference from 0.5mm tape is inside the tolerance of a normal table-saw cut, which is why the practical rule holds: only compensate when the banding is 1mm or thicker. Below that, cut to the finished size and let the tape disappear into your margin of error.
The trap is doing this compensation on some parts and forgetting it on others, or splitting a dimension unevenly. If a cabinet side is banded only on its front edge, subtract the banding once from the depth, not from both the depth and the width. Mixing thin tape on some edges with thick lipping on others in the same project is where hand-calculated cut lists quietly go wrong - it is a close cousin of the errors in our roundup of common cut list mistakes.
Two other settings interact with banding on the shop floor. Your saw kerf still eats material between parts on the sheet and is a separate subtraction from banding - do not conflate the two. And if you are using real wood veneer tape, grain direction matters: run the banding grain the same way as the face veneer so the edge reads as one continuous surface. That does not change any dimension, but it does change which roll you buy and how you orient offcuts of tape.
Account for Edge Banding Automatically
Set the banding thickness and pick which edges are banded. CutPlan adjusts every cut dimension for you, so parts come off the saw at the right size the first time.
Open Optimizer →Which Edges Actually Need Banding
Only edges that are visible in the finished piece need banding. Everything hidden against a wall, buried behind a kick, or joined into another panel can stay raw - banding it wastes tape, time, and sometimes messes up a glue joint. Here is a component-by-component map for a standard base cabinet.
| Component | Band these edges | Leave raw |
|---|---|---|
| Side / gable panels | Front edge | Back, top, bottom (hidden or joined) |
| Adjustable shelves | Front edge (both ends optional) | Back edge |
| Fixed shelves / bottom | Front edge | Back and ends (captured in dado) |
| Doors and drawer fronts | All four edges | Nothing |
| Toe kick / plinth | Top edge (if it shows) | Bottom, ends |
| Fixed back panel | Usually none | All four |
Doors are the one component you band on all four sides, and they are also the least forgiving of dimensional error, because a banded door has to keep an even reveal all the way around its opening. If you are unsure whether an edge will be seen, kneel down and look at the piece from where the user will stand - anything in that sightline gets banded.
When to Apply Edge Banding in Your Build
Band after cutting, before assembly. Once parts are cut, every edge is flat, accessible, and easy to work on a bench. Try to band after a carcass is glued up and you are fighting inside corners with a hot iron and a trimmer that will not reach - it looks like it, too. The clean workflow is: cut all parts, band all visible edges, trim and sand flush, then assemble. It also lets you band a stack of shelves in one heat-up rather than chasing the iron temperature back and forth.
Iron-On Application, Step by Step
Iron-on tape is the most common type and the process is forgiving once you dial in the heat.
- Cut the tape long. Leave 10 to 15mm of overhang on each end; you trim it flush afterward.
- Use medium heat. The cotton/linen setting, roughly 150 to 180 degrees C, is right. Too cool and the glue never flows; too hot and you scorch the tape or bubble PVC.
- Move slowly and steadily. About 5 to 10cm per second, pressing firmly. The adhesive needs dwell time to melt and soak into the core.
- Press while molten. Follow the iron immediately with a wood block or a laminate roller, pressing hard while the glue is still liquid. This kills air pockets and gives you full contact.
- Trim clean. Once cool, remove the overhang with a double-edge trimmer, a sharp chisel or utility knife, or a flush-trim router bit. A dedicated trimmer gives the cleanest corners for the least money.
- Ease the edge. Finish with 220-grit, sanding at a slight angle to soften the arris and knock back any last overhang. Sand with the grain on veneer tape.
Common Edge Banding Mistakes
- Cutting to the finished size, then banding anyway. The classic. On thick lipping this makes every banded part oversized and can throw off a whole run of doors. Subtract the banding from the cut size first, on every banded edge.
- Compensating on some parts but not others. Mix corrected and uncorrected parts in one project and nothing lines up. Decide your banding scheme up front and apply it to the whole cut list.
- Moving the iron too fast or too cold. The glue never fully melts, the tape lifts at a corner a week later, and you are re-doing it. Slow down and let the adhesive flow.
- Skipping the press. Heating the glue but not pressing while it is molten leaves air pockets that telegraph through the tape. Roll or block it hard right behind the iron.
- Banding edges nobody will ever see. Backs, dado-captured ends, and hidden bottoms do not need tape, and banding a glue joint can weaken it. Band the sightlines, leave the rest raw.
- Trimming veneer tape against the grain. A dull blade or a wrong-direction cut tears the wood fibres and ruins the edge. Use a sharp double-edge trimmer and finish with the grain.
Frequently Asked Questions
What is edge banding and what is it for?
Edge banding is a thin strip of material glued to the exposed edge of a sheet panel to hide and seal the raw core. Plywood, MDF, particle board, and melamine all show an unfinished edge after cutting, and banding covers that edge so the panel reads as a solid piece and keeps moisture and knocks away from the core. The mechanism is simple: a strip slightly wider than the panel thickness is bonded to the edge with hot-melt or PVA adhesive, then trimmed flush on both faces. The common iron-on PVC or melamine tape is 0.4 to 0.8mm thick and comes pre-glued, so a household iron applies it, while solid wood lipping at 3 to 6mm is glued and clamped and can be profiled. On a base cabinet the front edges of the sides and shelves get banded because they face the room, and the back edges against the wall stay raw.
Does edge banding affect my cut dimensions?
Only if the banding is 1mm or thicker. Banding sits on top of the panel edge, so the finished part is larger than the piece you cut by the banding thickness on every banded edge. Standard iron-on PVC or veneer tape at 0.4 to 0.8mm adds less than a normal table saw's tolerance, so you cut to the finished size and let the tape disappear into your margin of error. Unglued strips at 1 to 3mm and solid wood lipping at 3 to 6mm are different: subtract the banding thickness once for every banded edge along that dimension before you cut. A shelf with a finished width of 500mm banded on both ends with 2mm lipping is cut at 496mm; with 6mm lipping it is cut at 488mm. The trap is compensating on some parts and not others, or subtracting on both ends when only the front edge is banded. Decide the scheme for the whole cut list first.
Which edges need banding?
Any edge that will be visible in the finished piece, and nothing else. Banding exists to hide and seal the raw core, so an edge nobody sees gains nothing from it, and banding a surface that will be glued can weaken the joint. On a standard base cabinet, side panels get banding on the front edge only, adjustable and fixed shelves on the front edge, and the toe kick on its top edge if it shows. Doors and drawer fronts are banded on all four edges, which also makes them the least forgiving of dimensional error, because a banded door must keep an even reveal all the way around its opening. Back edges against a wall, shelf ends captured in a dado, hidden bottoms, and a fixed back panel stay raw. When you are unsure, kneel down and look at the piece from where the user will stand; anything in that sightline gets banded, and the rest saves tape and time.
Can a cut list optimizer account for edge banding?
Yes. In CutPlan you set the banding thickness and mark which edges of each part are banded, and the tool adjusts every cut dimension for you, so the part comes off the saw at the right size without manual subtraction. The mechanism is the same arithmetic you would do by hand: for each banded edge along a dimension, the banding thickness is subtracted once from the finished size to give the cut size. Doing it in the optimizer removes the two classic failure modes, forgetting the subtraction on a few parts in a long list and splitting a dimension unevenly when only one edge is banded. The video above shows the effect: a part cut to 400 finishes at 402 when banding is ignored, while banding assigned per edge gives you both the cut size and the finished size. Saw kerf remains a separate subtraction between parts on the sheet and is never part of the banding math.