How to Create a Cut List for Kitchen Cabinets

A kitchen cabinet cut list is a complete inventory of every panel you need to cut for a run of cabinets: sides, tops, bottoms, shelves, backs, drawer boxes, and door fronts, each with an exact width, height, material, and quantity. Build the list accurately before you touch the saw and you will typically trim 15 to 25% off your material bill and avoid the most expensive mistakes in cabinetmaking: mismeasured panels and forgotten parts. The workflow never changes, whether you are building one sink base or a full 15-cabinet kitchen: measure the room, plan the layout, list every part with its correct deductions, optimize the sheet layout, then export labelled cut sheets to the workshop. This guide walks all five steps and finishes with a fully worked example for a real galley kitchen so you can see the numbers end to end.
Anatomy of a Kitchen Cabinet
Before you can list parts, you need to know what a cabinet is made of. Base, wall, and tall units all share the same skeleton, and only the dimensions change.
A standard frameless (European-style) base cabinet carcass is made up of:
- Two side panels (gables): the vertical walls of the box, cut from 18mm carcass material. In a frameless box the sides are the outermost panels, so they run the full depth and everything else fits between them.
- Top rails or a full top: two 100mm stretchers on a base unit (so a worktop can sit over it), or a full panel on a wall unit.
- Bottom panel: the floor of the box, captured between the sides.
- Back panel: thinner 6mm or 12mm stock, set into a rebate or nailed to the rear edges to square the box.
- Shelves: fixed or adjustable, cut 2 to 3mm shy of the internal width so they drop in cleanly.
- Face frame (optional): a solid-wood frame across the front, standard on American-style cabinets and absent on frameless boxes.
Drawer boxes add five parts each: two sides, a front, a back, and a bottom. It is easy to undercount these, so multiply deliberately: a three-drawer base adds 15 parts on top of the carcass, a four-drawer bank adds 20.
Door and drawer fronts are cut separately, usually from the same sheet stock for a slab look, or from MDF when they will be sprayed. Because MDF has no grain and takes paint beautifully, many makers run carcasses in birch or melamine ply and fronts in MDF. See our plywood cut list guide for how material choice changes your yield.
Group your list by material and thickness from the start. A typical kitchen produces three groups: 18mm carcass ply, 6mm hardboard backs, and 18mm MDF fronts. Each group is optimized against its own stock sheet, so mixing them in one run gives unusable results.
What thickness is a kitchen cabinet carcass panel? 18mm, for a standard frameless kitchen. The side panels (gables), top rails, bottom, and shelves are all cut from 18mm carcass ply, with a thinner 6mm hardboard back set into a rebate and 18mm MDF for the fronts. 18mm is the typical commercial thickness because it holds screws and shelf loads without sagging.
Step 1: Measure Your Kitchen
Accurate measurements are the foundation of the whole list. A 5mm error on a wall length can push a run of cabinets past a window or leave a gap you cannot close cleanly. Measure:
- Wall lengths at three heights (floor, mid-wall, ceiling) and use the shortest reading. Walls are rarely square or plumb.
- Ceiling height, which caps your tall units and sets the gap between base and wall cabinets.
- Obstacles: windows, pipes, sockets, radiators, and any structural column. Mark their exact positions on your sketch.
- Appliance openings: a dishwasher needs roughly 600mm, and ovens, fridges, and cooktops each have their own clearance in the manufacturer sheet. Design the gaps, do not guess them.
Standard carcass dimensions give you a reliable starting point. The table below reflects common metric kitchen sizing; adjust for your own worktop and appliances.
| Cabinet type | Depth | Height | Typical widths |
|---|---|---|---|
| Base unit | 560 to 600mm | 720mm carcass + 150mm plinth | 300, 400, 450, 500, 600, 800, 900mm |
| Wall unit | 300 to 350mm | 720 to 900mm | 300 to 1000mm |
| Tall / pantry | 560 to 600mm | 1970 to 2300mm | 500 to 600mm |
| Drawer bank | 560 to 600mm | 720mm carcass | 400 to 900mm |
Leave a 2 to 3mm gap between adjacent cabinets and at the wall for scribe and adjustment. It looks trivial, but skip it across a run of ten cabinets and you accumulate 20 to 30mm of error, which is often enough to stop the last unit fitting.
Step 2: Plan Your Cabinet Layout
With the room measured, sketch it to scale and assign a cabinet to each position. Number every unit (B1, B2, W1 and so on), because those numbers become the labels that keep 200 near-identical rectangles organized on the workshop floor. A typical L-shaped kitchen runs 12 to 16 base cabinets, 8 to 12 wall units, and 1 or 2 tall cabinets, producing 150 to 250 individual parts once you count backs, shelves, drawers, and fronts. (The free tier accepts up to 150 parts per calculation — a full kitchen at the top of that range means splitting the job into runs, most naturally one per material group, or going Pro).
Decide your construction method now, because it drives every deduction in the next step. The two common choices are a rebated back (back panel sits in a groove, so the sides run full depth) or a captured back (back sits between the sides). Whichever you pick, apply it to every cabinet identically.
Step 3: List Every Part
Now work cabinet by cabinet and write down every component with its finished width and height. The critical skill here is the deduction: an overall cabinet width is not the width of the panels inside it. For a frameless 600mm base, 560mm deep and 720mm high, with 18mm sides and a captured bottom, the parts in 18mm ply are:
- 2x Side panel: 560 x 720mm (full carcass depth by carcass height, since the sides are the outer walls)
- 1x Bottom panel: 564 x 560mm (564 = 600 - 2 x 18, the width between the sides)
- 2x Top rail: 564 x 100mm
- 1x Shelf: 562 x 540mm (2mm under the internal width so it drops in, held back from the front and rear)
And in 6mm hardboard:
- 1x Back panel: 598 x 718mm (sized to sit in the rebate, a couple of mm under the outside dimensions)
The single most common cut-list error is mixing internal and overall dimensions, so pick one reference (I use overall/outside) and derive every internal part from it with the same arithmetic. We cover this and the other frequent slip-ups in depth in the most common cut list mistakes.
Do not forget the parts that live outside the carcass:
- Filler strips: 50 to 100mm wide, to close the gap at a wall or between cabinets.
- End panels: decorative skins over an exposed gable, often in the door material.
- Plinths (kick boards): 150mm high across the run, often reclaimed from offcuts.
- Cornice and pelmet: if your design uses them.
- Drawer boxes: five parts each, the most under-counted item on any list.
A Worked Example: A 9-Cabinet Galley Kitchen
To make this concrete, here is a full run I planned recently: a galley kitchen with five base units, three wall units, and one tall pantry, built frameless in 18mm birch ply with 6mm hardboard backs and 18mm MDF slab fronts. This is the level of detail your own list should reach before you optimize.
| Unit | Type | 18mm carcass parts | 6mm back | 18mm MDF fronts |
|---|---|---|---|---|
| B1 | 800 sink base | 2 sides, bottom, 2 rails | 1 | 2 doors |
| B2 | 500 single door | 2 sides, bottom, 2 rails, 1 shelf | 1 | 1 door |
| B3 | 500 three-drawer | 2 sides, bottom, 2 rails | 1 | 3 drawer fronts |
| B4 | 600 single door | 2 sides, bottom, 2 rails, 1 shelf | 1 | 1 door |
| B5 | 400 single door | 2 sides, bottom, 2 rails, 1 shelf | 1 | 1 door |
| W1 to W3 | Wall units | 2 sides, top, bottom, 1 shelf each | 1 each | 1 door each |
| T1 | 600 pantry | 2 sides, top, bottom, 4 shelves | 1 | 2 doors |
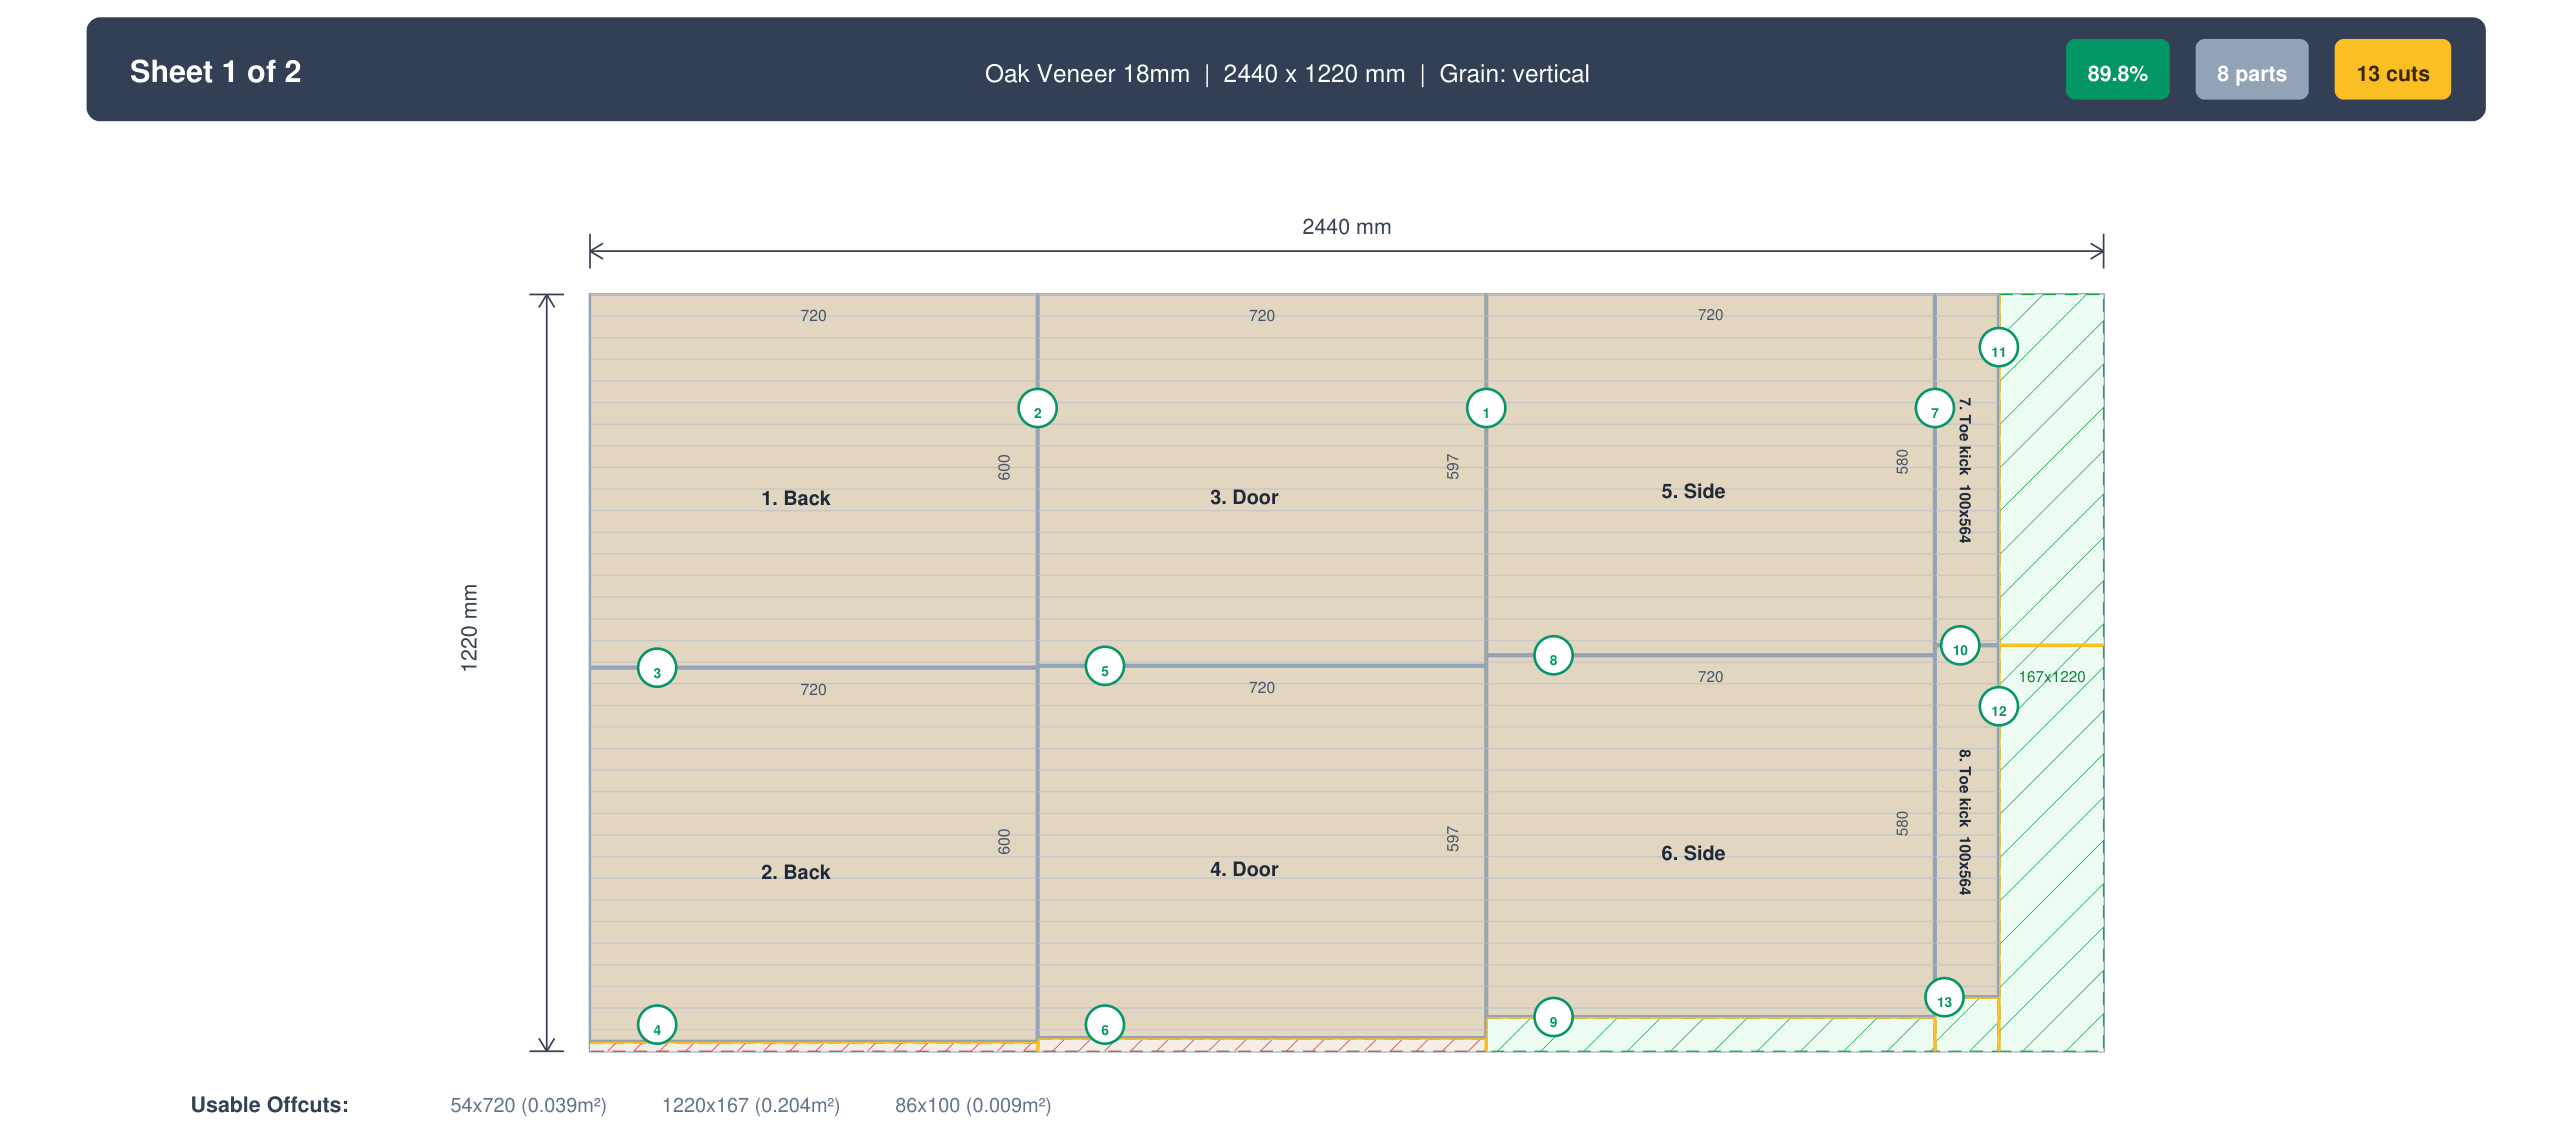
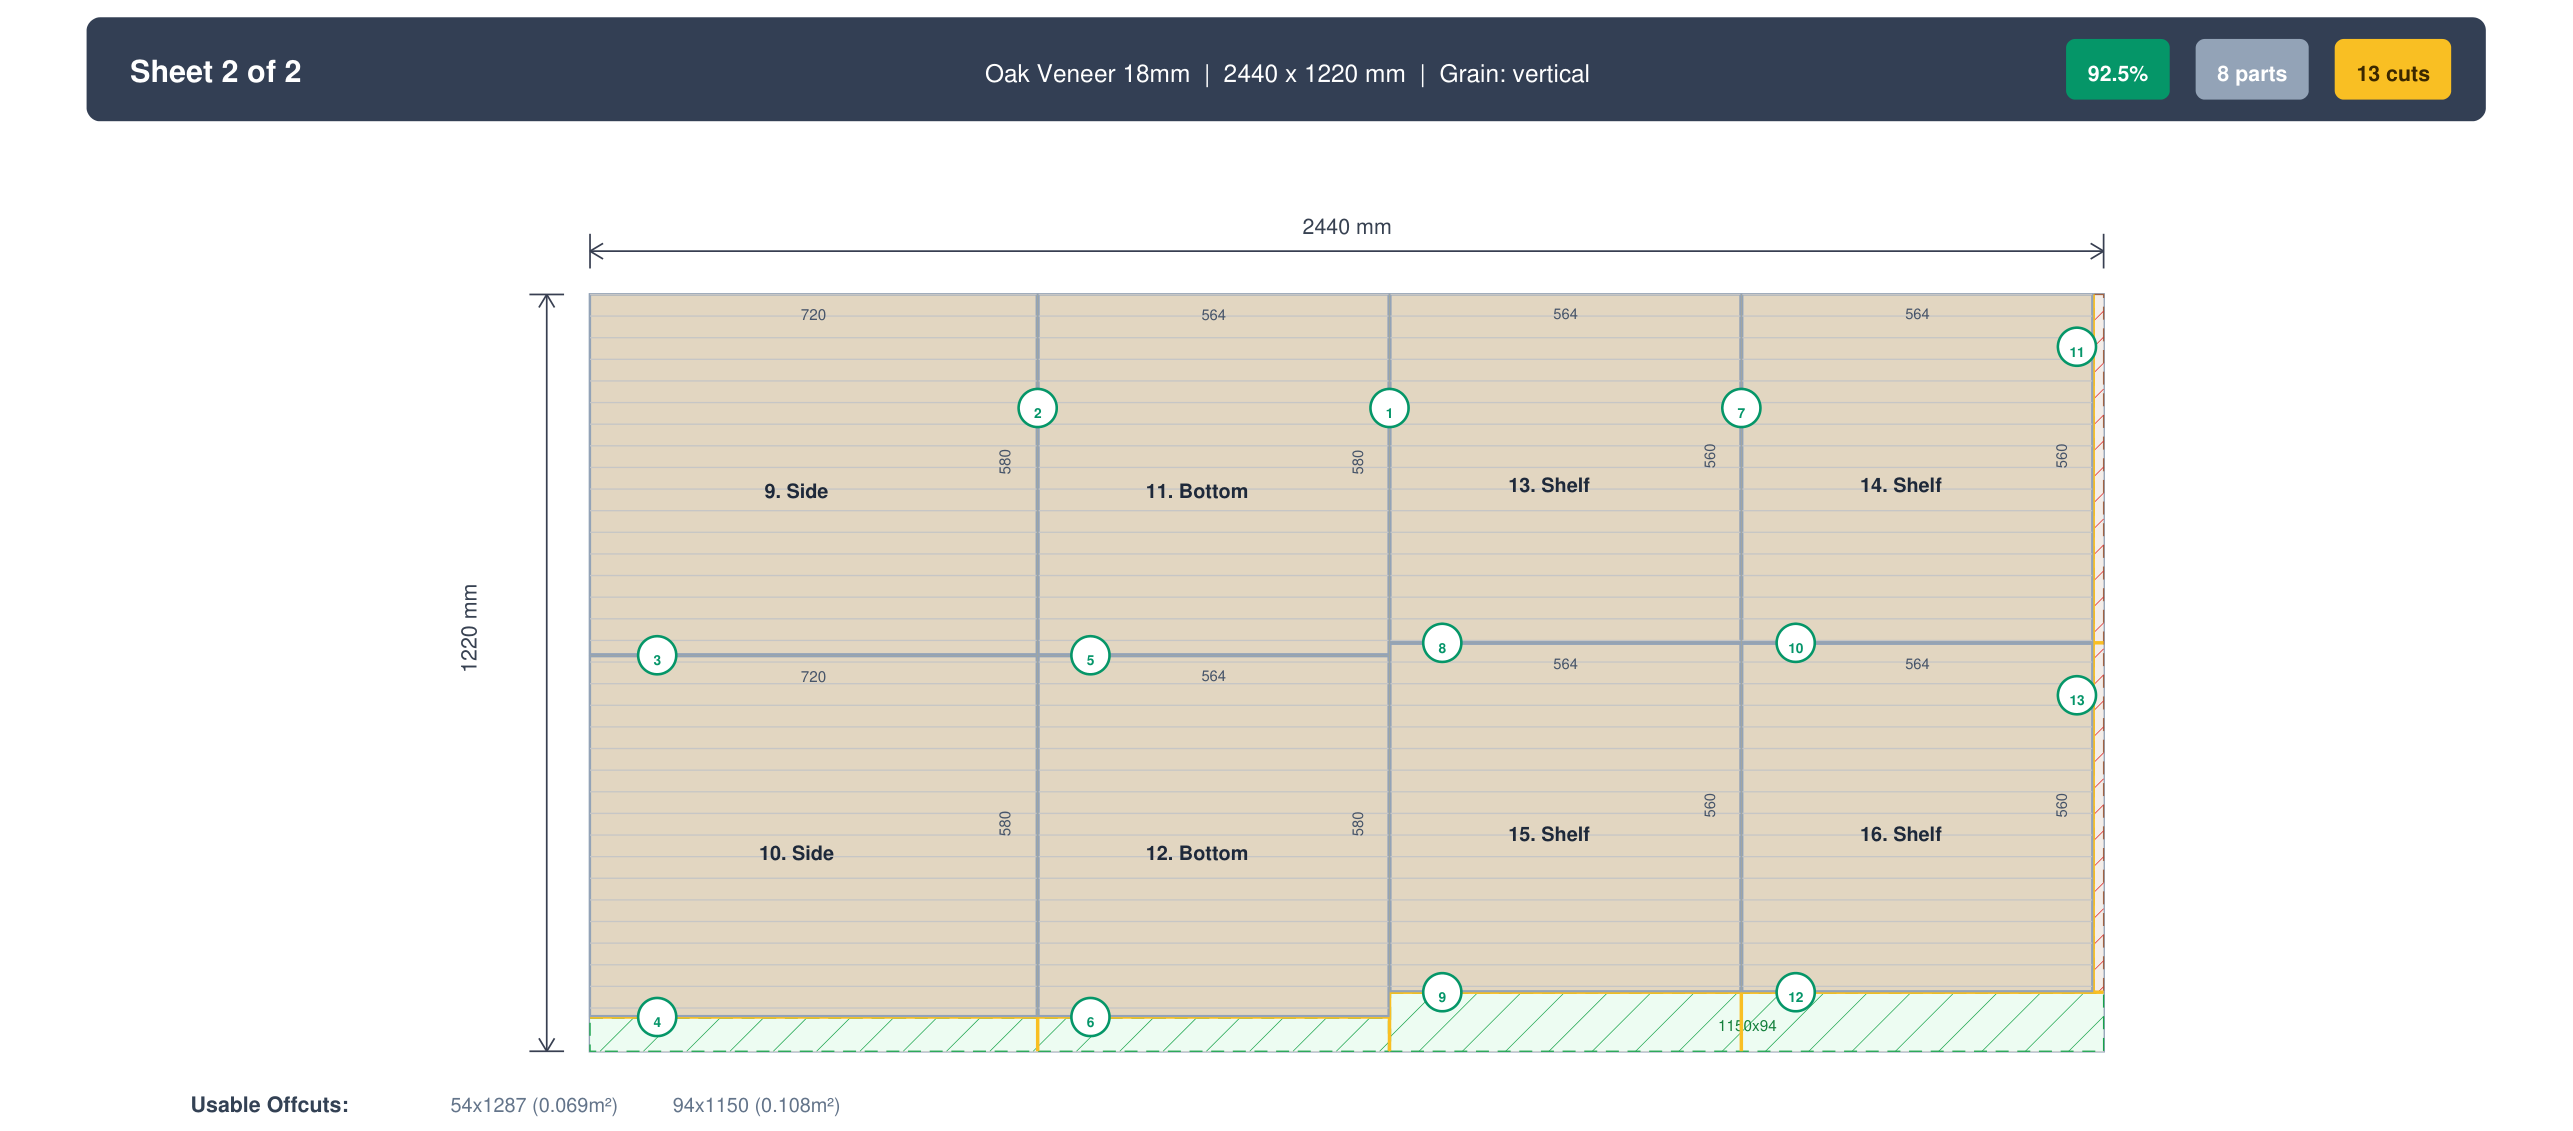
Counting it all out, this kitchen came to 51 carcass panels, 9 hardboard backs, and 13 MDF fronts, plus 15 drawer-box parts for the one drawer bank (cut from ply offcuts), roughly 88 pieces across three sheet-optimized material groups. Entered into an optimizer against 2440 x 1220mm sheets with a 3mm kerf and grain locked on the visible gables (the MDF fronts have no grain to lock), the layout resolved to five sheets of 18mm birch ply at 89% utilization, two sheets of 6mm hardboard for the backs, and two sheets of 18mm MDF for the fronts. Nine sheets in total.
For contrast, my first hand-drawn layout of the same parts used seven sheets of the 18mm ply because I could not juggle the drawer parts and the pantry shelves into the gaps by eye. Two extra sheets at 70 dollars each is 140 dollars of avoidable waste on a single kitchen, and the optimizer found the better layout in under a minute. That gap is the whole reason to plan the cut before you cut.
Step 4: Optimize the Sheet Layout
Arranging 80-plus parts onto stock sheets with minimal waste is a bin-packing problem, and doing it by hand is both slow and wasteful past a dozen parts. A cut list optimizer does it in seconds. To run a kitchen through CutPlan:
- Enter parts grouped by material and thickness, named by cabinet as above. Keep the three groups (carcass, backs, fronts) separate.
- Set your stock sheet size. Most regions supply 2440 x 1220mm, but confirm with your merchant, since sheet sizes vary by country.
- Set the saw kerf. A 3mm kerf is normal for a table saw and 4mm for a panel saw, so the optimizer subtracts the material each cut removes.
- Lock grain direction on the parts that show: gables, end panels, and veneered fronts (the lock binds only parts with a grain set, on stock that has one — new sheets default to vertical grain, so it works out of the box). Leave shelves, rails, and backs free to rotate so the packer can fill the gaps.
- Run it and read the sheet count. A tidy kitchen list lands around 85 to 92% utilization; CutPlan reports exactly how many sheets each material group needs.
Step 5: Export and Cut
Once the layout looks right, send it to the bench in the format that suits your saw:
- PDF for hand cutting on a table or panel saw: one page per sheet, every part labelled with its cabinet number and finished size.
- DXF (a Pro export) for a CNC router or beam saw, which reads the part coordinates straight off the file.
- CSV when a merchant is cutting the sheets for you and just needs the parts list.
Cut the carcass panels first, then the backs, then the fronts, writing each part's label onto the panel the moment it comes off the saw. Keep the 18mm offcuts back for plinths and filler strips; they usually drop into the waste the packer could not fill with a full panel. Do that and a kitchen that looks like 88 identical rectangles assembles itself in the right order.
Ready to Optimize Your Cut List?
Free, browser-based, no installation needed. Paste your parts and get an optimized layout in seconds.
Open Optimizer →Frequently Asked Questions
How many sheets of plywood do I need for 10 kitchen cabinets?
For ten cabinets of mixed base and wall units, expect somewhere around five to seven sheets of 18mm carcass material plus two sheets of 6mm hardboard for the backs, before doors and drawer fronts. The worked galley above, five base units, three wall units, and one tall pantry, came to 51 carcass panels and resolved to five sheets of 18mm birch ply at 89% utilization, two sheets of 6mm hardboard, and two sheets of 18mm MDF for the slab fronts, nine sheets in total. The real figure swings with cabinet width, how many drawer banks you build (each drawer box adds five parts), whether the pantry runs full height, and how much grain you lock, so treat any rule of thumb as an ordering estimate only. Enter the parts into an optimizer for an exact count per material group, then add a spare sheet of the carcass material for tearout and mismeasures.
Should I use plywood or MDF for cabinet carcasses?
Use plywood for the boxes. It is lighter, holds screws far better in the edge, and shrugs off the odd splash under a sink, which matters for gables and shelves that carry load; MDF edges crumble around a screw and swell if they get wet. Keep MDF for sprayed doors and fronts, where its dead-flat, grain-free face is exactly what you want under paint, and where each panel simply hangs on hinges rather than being asked to hold the carcass square. This split is why a typical kitchen list has three material groups: 18mm carcass ply, 6mm hardboard backs, and 18mm MDF fronts. Melamine-faced sheets are a common carcass choice in production shops because they arrive pre-finished and need nothing beyond edge banding, though they are heavier than plain ply. Whatever you pick, use one carcass material across the whole run so the deductions stay identical for every cabinet.
Which way should the grain run on cabinet sides?
Vertically, top to bottom, on every visible gable and on any veneered fronts, so a run of cabinets reads as one continuous grain from the plinth up. The eye picks out a rotated gable instantly, especially at the end of a run where the side panel sits next to a door, and no dimensional accuracy hides it. Sprayed MDF fronts have no grain to lock, so leave them free. Lock that grain direction in your optimizer for the show faces only, and leave shelves, rails, bottoms, backs, and drawer-box parts free to rotate, which recovers most of the yield you would otherwise lose to the constraint. The lock binds only parts with a grain set, on stock that has one; new sheets default to vertical grain, so it works out of the box. In the worked galley, grain was locked on the visible gables alone and the carcass ply still resolved at 89% utilization.
Do I subtract edge banding from my part sizes?
Yes, if you want a finished panel to hit its target size. Banding adds its own thickness to every edge it covers, so a part cut to the finished dimension ends up oversized once the band goes on. For 2mm banding on two opposite edges, enter the part 4mm smaller on that dimension; band one edge only and take off a single band thickness. Decide it once for the whole kitchen, write the rule at the top of your list, and apply it consistently to every door, drawer front, and exposed gable, because a forgotten 2mm on every door across a run adds up to visible reveal problems, uneven gaps between fronts, and doors that bind on their neighbours. Hidden carcass edges that are never banded need no deduction at all. Note the deduction beside each banded part on the list so nobody at the saw applies it a second time.
How do I make a cutting list for kitchen cupboards?
Start from the finished cabinet sizes and work inward to the parts. Measure the kitchen, decide the run of base and wall cupboards, and give each cabinet an overall height, width, and depth. Then break every cabinet into its panels: two sides, a top or top rails, a bottom, a back, shelves, and any doors and drawer fronts, and write each one as a row with its length, width, thickness, quantity, and material. The sizes come from simple subtraction, so a shelf is the cabinet width minus two side thicknesses, and a back is sized to the carcass it closes. Note grain direction on visible faces and any edge banding deduction beside the part. Repeat for every cupboard, then group the rows by material and thickness, because carcasses and backs are cut from different stock. That table is the cutting list; running it through an optimizer turns it into a sheet-by-sheet layout, as the worked galley kitchen above shows.
What thickness is a kitchen cabinet carcass panel?
18mm, for a standard frameless kitchen. The side panels (gables), top rails, bottom, and shelves are all cut from 18mm carcass ply, with a thinner 6mm hardboard back set into a rebate and 18mm MDF for the fronts. 18mm is the typical commercial thickness because it holds screws and shelf loads without sagging.